Well, it looks like you have been searching for the “How to root Moto G5 Plus” or “How to root Moto G5”. If you asked me, I would say it so simple like other Moto devices only. But for your convenience, I’ll be guiding you through the complete process of how you can root your Moto G5 or G5 Plus. And for your kind information, you’ll void your warranty for sure.

Warning: We’re not responsible for bricked devices, dead SD cards or anything wrong that happens. So do this at your risk. Without any further doing, let’s get started with the rooting process.
STEP 1: How to Unlock Bootloader on Moto G5 And Moto G5 Plus
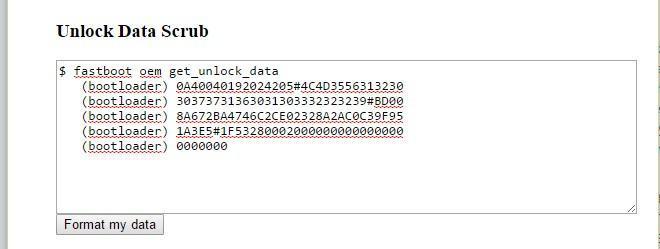
Unlocking bootloader is almost the same for every Moto device. Just google it, and you’ll get the process. Just follow this guide, and you’ll be good to go ahead with the rest of the process.

STEP 2: DOWNLOAD THE REQUIRED FILES
You’ll be required to download these files below so that you don’t get stuck anywhere in the process down below. Here’s the list of files needed to download:
- Universal Windows ADB Driver
- TWRP For Moto G5
- TWRP For Moto G5 Plus
- Motorola Driver
- ADB FASTBOOT FILES
- Magisk-v12.0.zip
- lazyflasher-no-verity-opt-encrypt.zip
STEP 3: PREPARATION
- Make sure you Enable USB Debugging by going into Settings>About Phone and tap the Build Number 7 times until you get the message ‘You’re now a developer!’. Now go back and go to Developer options and find “USB debugging” and then enable it.
- In the ‘Developer Options,’ you will also find the ‘OEM Unlocking’ option, just enable it. It will ask for your PIN/Screen unlock code to enable it.
- Now, you’ll be required to extract the ADB FASTBOOT FILES zip into ADB FASTBOOT FILES folder. Then, rename twrp-3.1.0-0-potter.img (if you have a G5 Plus) or twrp-3.1.0-0-cedric.img (if you have a G5) into twrp.img for our convenience. Now grab the twrp.img file and drop it in the ADB FASTBOOT FILES folder.
- Install Universal Windows ADB Driver on your PC, then install Motorola Driver and restart your PC.
STEP 4: How to Install TWRP Recovery And Root Moto G5 And Moto G5 Plus
- Connect your Moto G5 or G5 Plus to your PC via USB cable. Once you connect to PC, you will get a pop up on your Moto G5 or G5 Plus.
- Just tick the “Always allow from this computer” checkbox and tap OK.

- Open the “ADB FASTBOOT FILES” folder on your PC. Inside the folder, hold “Shift” Key then right click and select “Open command Windows here”.

- Now type this bellow command: adb devices
- Now you will be able to see your device or Moto G5 or G5 Plus which means drivers are installed properly
- Now disconnect your Moto G5 or G5 Plus from PC, don’t close the command prompt.
- Put your device in fastboot mode (power off, then press the power and volume down buttons simultaneously).

- Type this command and hit enter, just make sure twrp.img file is in the ADB FASTBOOT folder.
fastboot flash recovery twrp.img
- Once the flashing is done, take your phone and use Volume UP or down Key to navigate “RECOVERY MODE”. Just press Power button to enter RECOVERY MODE.
- You will see TWRP recovery mode. It will ask for a password, just tap on cancel and tap on Wipe.
- Then select format data, you need to type “yes” to format your phone. Now on home screen tap on Reboot and select Recovery. It will reboot into TWRP Recovery mode again.
- As your Phone connected to PC just copy paste Magisk-v12.0.zip and lazyflasher-no-verity-opt-encrypt.zip into your phone internal memory. Now, on the TWRP recovery mode, tap on Install then browse and select Magisk-v12.0.zip and swipe to flash it. Similarly, install the lazyflasher-no-verity-opt-encrypt.zip as well.
- Now tap on Reboot then select System. It will take some time to reboot so don’t worry.
- Once done your Moto G5 or G5 Plus is rooted finally. Now you have a fully rooted Moto G5-Plus and Moto G5 in your hands. You can also install Android O-based custom ROM’s on your G5 and G5 Plus smartphone.
That’s it. You’re now rocking a rooted device. I hope you understood this rooting process of Moto G5 or G5 Plus. If you’ve any problems, make sure to comment below regarding this.


