DISCLAIMER :
By attempting the procedure of root Moto G Turbo, you are unlocking your bootloader and rooting your phone. Any harm done to your phone while attempting the procedure is entirely your fault. You don’t have any right to put the blame on us. Try at your own risk.
NOTE :
Backup all your important files of your Moto G Turbo. Unlocking bootloader will format your phone and will erase everything including internal storage. If you want to root Moto G3 then go to this article.
REQUIREMENTS :
You need some files to root Moto G Turbo, Download the files first and keep them in a safe place.
1.DOWNLOAD THESE FILES –
Moto G Turbo Edition TWRP Recovery
BETA-SuperSU-v2.62-3-20151211162651.zip

PROCEDURE :
- ENABLING USB DEBUGGING –
- Go to phone settings. Select about phone option. Tap on ‘build number’ 7 times.
- Go back to Settings, choose ‘Developer options’. Find the ‘USB debugging’ option and enable it.
- In the ‘Developer Option’ you will also find the ‘OEM Unlocking’ option, just enable it.
- SETTING UP YOUR COMPUTER –
- Create a folder named ROOT on your desktop and extract the ADB FASTBOOT FILES.zip archive to ROOT folder.
- Now put the twrp-merlin-2.8.7-r7.img file in ROOT
- Install Universal Windows ADB Driver on your PC, then install Motorola Driver and restart your PC.
How to unlock bootloader of Moto G Turbo
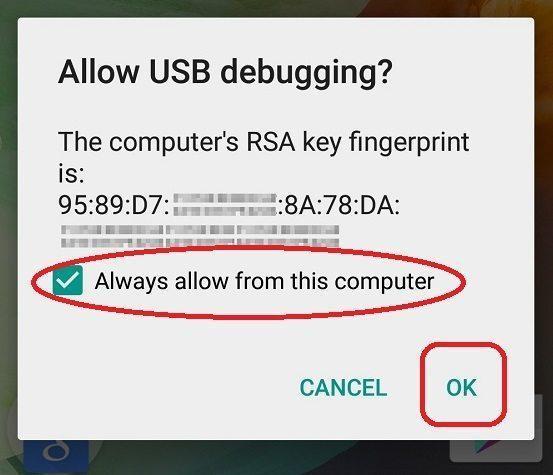
Connect your Moto G Turbo to PC via USOnce you connect to PC, you will get a pop up on your Moto G TurboJust tick the “Always allow from this computer ” checkbox and tap OK

- Open the “ROOT” folder on your PC
- Inside the folder, hold “Shift” Key then right click and select “Open command Window here”
- Now type ADB devices in CMD.
- It should show some device with its ID their.
- Now without closing CMD disconnect your phone and switch it off.
- Press and hold the power button and volume down button for 10 seconds and then relieve.
- Your phone will now boot into fastboot Now connect your phone to PC via USB.
- Now type fastboot OEM get_unlock_data and hit enter.
- It will return some strings to you. Copy them.
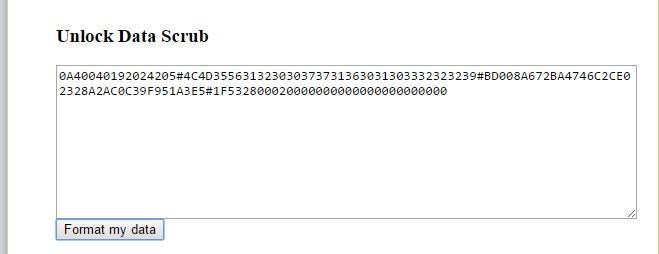
- Now open this link and paste the copied content and hit the button.

- It will return back something like this.

- Copy all those strings and visit this link create an account there and then paste the link there.

- Copy that key and now open the CMD window and type fastboot OEM unlock XXXX in place of XXXX XXXX type the key that you got in the email and press enter. Voila your Moto G Turbo bootloader is now unlocked.
How to install TWRP recovery on Moto G Turbo
- Now click the button. And on the next page request a unlock key. You will get the key in the email with which you logged on the Motorola’s website.
- After finishing the process Your phone will restart. If not, then restart manually. Now switch off again and press power + volume down simultaneously for 10 seconds and release.
- Now in CMD type fastboot flash recovery twrp-merlin-2.8.7-r7.img
- Once the flashing process completes disconnect your Moto G Turbo from PC.
- Use volume down key to select recovery and then press volume up to boot into recovery.
- Once booted into recovery select FLASH option and navigate to the folder where you pasted the zip file. Once selected, swipe the blue button at the bottom. Then when it finishes flashing click on reboot system.
- Now your Moto G Turbo has TWRP recovery installed.
How to root Moto G Turbo
- Copy and paste the SuperSu Zip file to your Phone’s external/internal memory from your PC.
- Power off your smartphone and enter the recovery by pressing Power + Volume Down button.
- Select Install button and browse Super SU file.
- Flash the file on your device.
- Voila, now you have a rooted Moto G Turbo. Also, download root checker app from play store to ensure the availability of root access.


Point 6 – which zip file to flash twrp zip or anything?
please give android n update moto g turbo
any issues after rooting
The 2nd point under How to root Moto G Turbo.(Power off your smartphone and enter the recovery by pressing Power + Volume Down button.)
Moto G never goes to recovery like this and Im stuck at going into the installed recovery. Im very glad that you have explained everything so good but this trivial thing would make people mad.
i dint get the popup of always allow from this device